If you’ve ever wished you could multiply your favorite plants quickly, easily, and without complicated tools, you’re in the right place. Gardeners around the world are discovering a surprisingly simple method to root almost any branch using just one inexpensive, natural ingredient. Whether you’re a beginner or an experienced plant lover, this rooting technique will transform the way you propagate plants at home.
In this article, you’ll learn why this method works, how to apply it step-by-step, which plants respond best, mistakes to avoid, and tips for boosting your success rate. Let’s dive in!
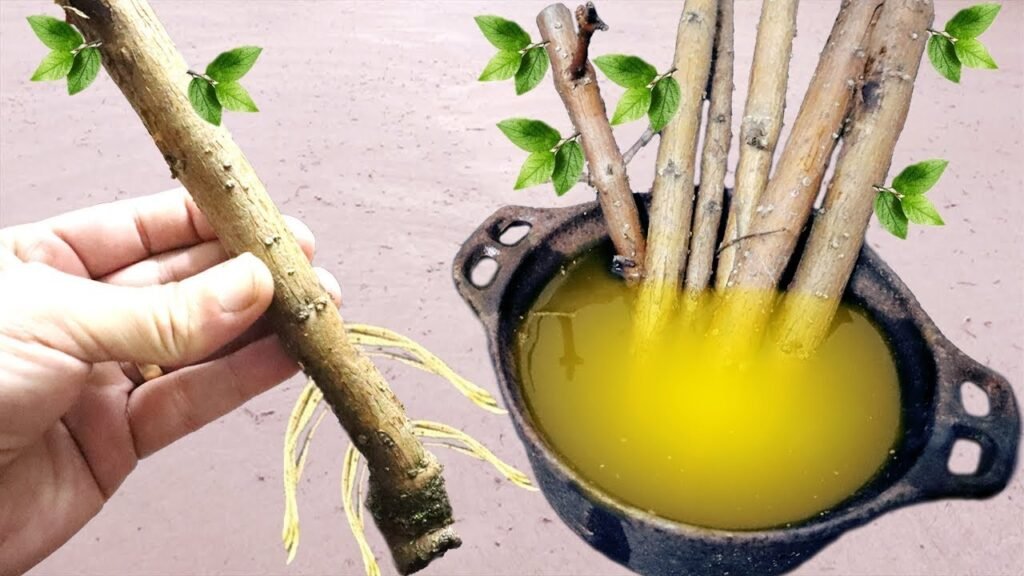
The Secret Ingredient: Honey – Nature’s Perfect Rooting Booster
Yes, the magic ingredient is pure natural honey. This kitchen staple is far more than a sweetener—it’s a powerful, natural rooting agent that has been used by gardeners for generations.
Why Honey Works for Rooting
Honey is effective because it has:
- Antibacterial and antifungal properties – protects fresh cuttings from rotting.
- Trace enzymes and nutrients – help stimulate early root formation.
- Natural humectants – keep the cutting moist and hydrated.
- A mild antiseptic layer – seals the wound and encourages callus formation.
While honey does not contain growth hormones like synthetic rooting powders, it provides the ideal clean, moist, protected environment roots need to emerge.
Best Plants to Root Using the Honey Method
This technique works well for:
- Flowering shrubs: hibiscus, roses, bougainvillea, jasmine, oleander
- Houseplants: pothos, philodendron, monstera, ficus
- Fruit plants: fig, mulberry, pomegranate, guava, grapevine
- Herbs: basil, mint, rosemary, thyme
- Ornamentals: coleus, lantana, dracaena
Hardwood cuttings may take longer, but honey still gives them a cleaner, safer start.
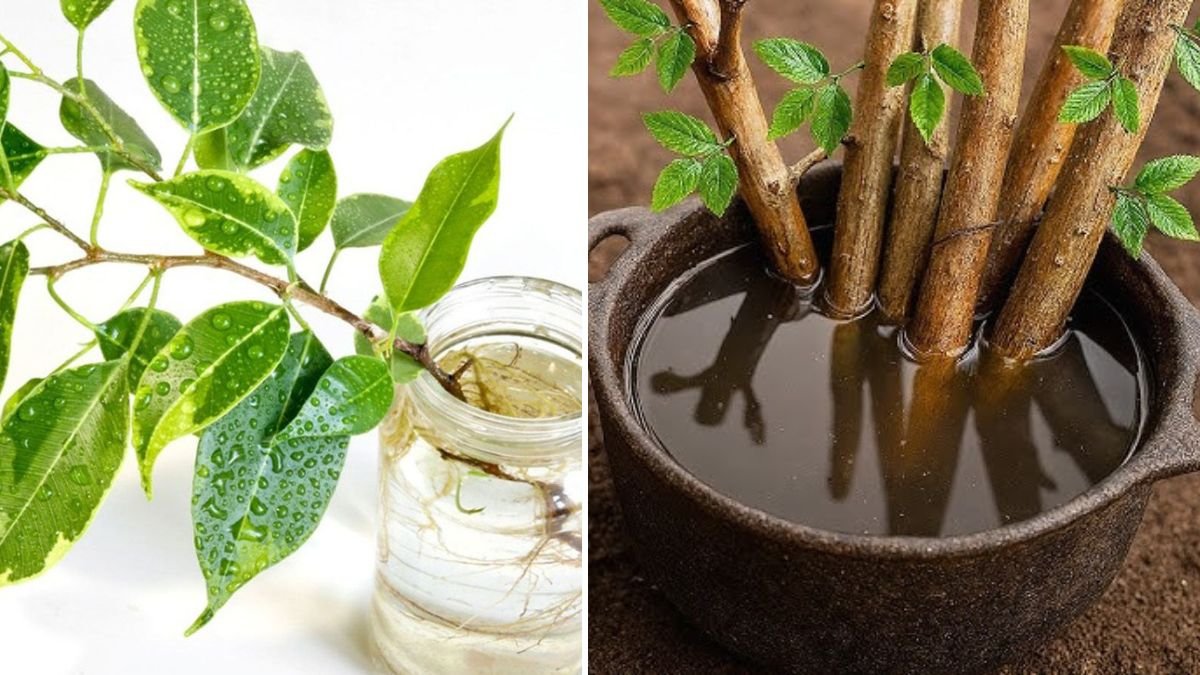
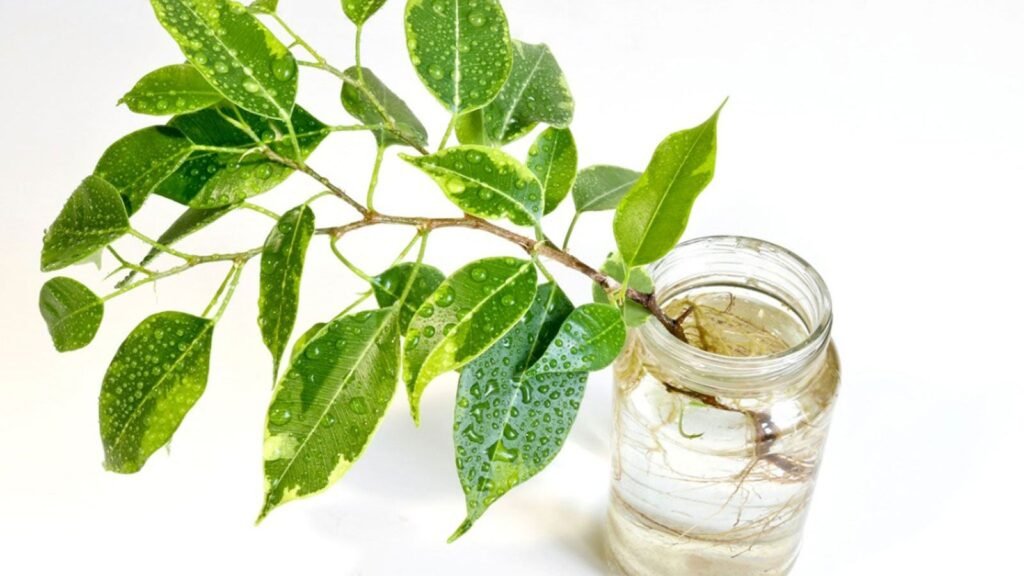
How to Root Any Branch Using Only Honey: Step-by-Step Guide

Step 1: Choose the Right Branch
Select a branch that is:
- Healthy, pest-free
- Semi-hardwood or young woody growth
- 6–8 inches long with at least 3 nodes
Avoid branches that are too old, too young, or too woody.
Step 2: Make a Clean Cut
Using clean pruning shears:
- Cut the branch at a 45° angle
- Remove leaves from the bottom half
- Keep 2–3 leaves at the top for photosynthesis
A slanted cut increases rooting surface area.
Step 3: Prepare Your Honey Mixture
You can use two forms:
1. Pure Honey (best for woody stems)
Dip the cut end directly into undiluted honey.
2. Honey Solution (ideal for delicate herbs)
Mix:
- 1 tablespoon honey
- 1 cup warm water
Dip the cutting for 2 minutes.
Warm water activates honey’s enzymes.
Step 4: Plant the Treated Cutting
Choose one of the following mediums:
- Cocopeat (best success rate)
- Perlite + peat mix
- Sand + soil mix
- Vermiculite
Insert the cutting 1.5–2 inches deep and press the soil gently.
Step 5: Create a Humid Environment
Cuttings root best with high humidity. You can use:
- A plastic bottle dome
- A clear plastic bag
- A mini greenhouse
Ensure there’s airflow by poking 2–3 small holes.
Step 6: Keep the Cuttings in the Right Spot
Place them in:
- Bright, indirect sunlight
- Warm temperature (22–28°C)
- Away from harsh wind or direct sun
Water lightly. Keep the soil moist, not soggy.
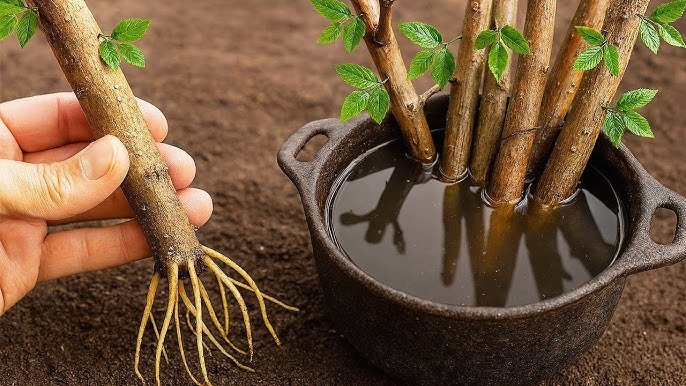
Step 7: Be Patient – Roots Take Time
Depending on plant type:
- Herbs root in 7–10 days
- Soft-stem plants root in 2–3 weeks
- Woody shrubs may take 4–6 weeks
Gently tug after 2 weeks—resistance means roots are forming!
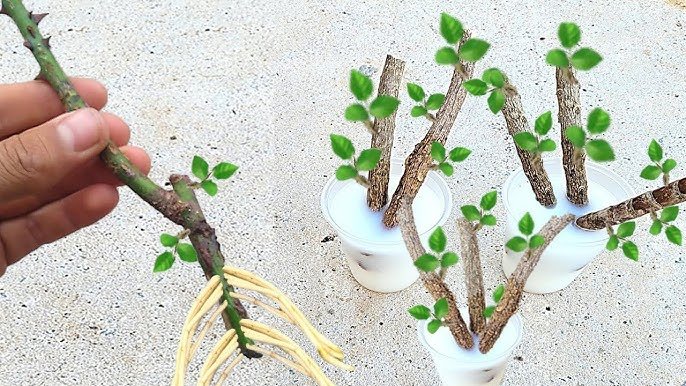
Transplanting the Rooted Branch
Once new leaves appear and roots reach 2–3 inches long:
- Prepare a pot with nutrient-rich soil.
- Gently remove the cutting without damaging roots.
- Plant it at the same depth as the rooting container.
- Water well and keep in shade for 3–4 days.
- Gradually introduce to sunlight.
Your new plant will now grow vigorously!
Why This Technique Works Better Than Many Others
Using honey for propagation provides unique advantages:
Chemical-Free & Safe
Perfect for organic gardeners and safe for homes with children or pets.
Cost-Effective
No need for expensive rooting powders or hormone gels.
Prevents Rot
One of the biggest causes of cutting failure is fungus—honey solves this naturally.
Suitable for Beginners
No special tools, equipment, or expert skills required.
Common Mistakes to Avoid
Even with honey, avoid these pitfalls:
Using old, woody, or diseased branches
Healthy, young growth is essential.
Overwatering
Too much moisture causes rot—keep soil just damp.
Placing cuttings in direct sunlight
They dry out before roots form.
Dipping in too much honey
A thick coating can suffocate the stem.
Using impure, sugary syrup
Only real natural honey works well.
Pro Tips for Higher Success Rates
Boost your rooting success with these expert techniques:
Tip 1: Scratch the lower stem
Lightly scrape 1 cm of bark to expose cambium—stimulates faster rooting.
Tip 2: Warm the soil
Warm soil speeds up cell division and root growth
Tip 3: Bottom watering
Prevent fungal issues by watering from below.
Tip 4: Use cinnamon with honey
Cinnamon adds extra antifungal protection.
Tip 5: Keep cuttings grouped together
Higher humidity boosts rooting percentage.
Plants That Root Amazingly Well Using Honey
These plants show very high success rates:
- Bougainvillea
- Hibiscus
- Coleus
- Money plant (pothos)
- Grape vines
- Roses
- Mint
- Rosemary
- Mulberry
- Jade plant
Try this method on your favorite plants—you’ll be amazed!
Final Thoughts
Rooting plants doesn’t have to be complicated or expensive. With just one natural ingredient—honey—you can propagate almost any plant easily at home. This simple, beginner-friendly technique not only saves money but also brings the joy of creating new life from existing plants.