Sorrel, a leafy green herb known for its tangy flavor, is a delightful addition to gardens and kitchens alike. Often used in salads, soups, and sauces, this perennial herb can grow in various climates, making it accessible for home gardeners. This guide will take you through the process of growing sorrel, from selection and planting to harvest and culinary uses.
Understanding Sorrel
Before diving into cultivation, it’s important to understand what sorrel is. There are several varieties, but the most common ones include French sorrel (Rumex scutatus) and garden sorrel (Rumex acetosa). French sorrel has a smoother, less jagged leaf and a milder flavor. Garden sorrel, on the other hand, has a more pronounced tanginess and is taller.
Nutritional Profile
Sorrel is not just flavorful; it’s also nutritious. Rich in vitamins A and C, it provides minerals like potassium and iron, making it a great addition to any nutritious diet. The high oxalic acid content gives sorrel its distinct sour taste and can also aid in digestion.
Step 1: Choosing the Right Variety
Select a sorrel variety based on your taste preferences and local climate. If you live in a warmer climate, French sorrel may be the best choice as it tends to be less hardy than garden sorrel.
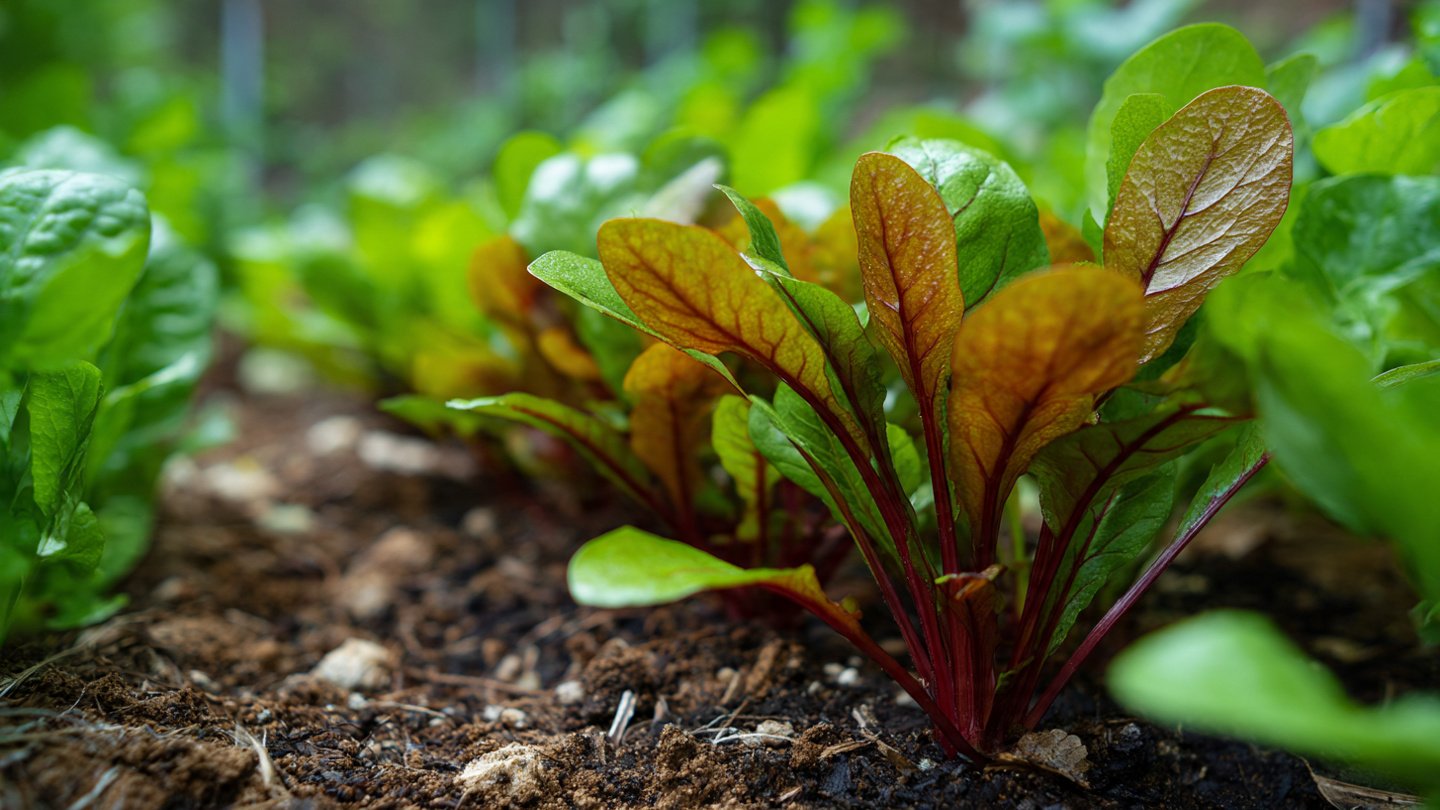
Popular Varieties
- French Sorrel: Mild flavor, ideal for salads.
- Garden Sorrel: Tart flavor, great for soups and sauces.
- Blood Sorrel (Rumex sanguineus): A beautiful plant with reddish veins, used more for ornamental purposes but edible.
Step 2: Ideal Growing Conditions
Sorrel is relatively easy to grow but does best under specific conditions.
Soil Requirements
- Soil Type: Sorrel prefers well-draining soil rich in organic matter. Loamy or sandy soils are ideal.
- pH Level: Aim for a soil pH of 6.0 to 7.0. Sorrel dislikes excessively acidic soils.
- Nutrient Content: Enrich your soil with compost or well-rotted manure to provide sufficient nutrients.
Light and Temperature
- Sunlight: Sorrel thrives in full sun but can tolerate partial shade. Choose a location that gets at least 6 hours of sunlight per day.
- Temperature: This green herb prefers cool temperatures. It grows best in spring and fall, when temperatures range from 50°F to 70°F (10°C to 21°C). In hot summer months, it may bolt (flower), leading to a bitter taste.
Step 3: Planting Sorrel
Starting from Seeds
- When to Plant: Sow seeds in early spring for a summer harvest, or in late summer for a fall harvest.
- Sowing Depth: Plant seeds 0.5 inches deep and space them about 12 inches apart.
- Spacing: Rows should be at least 18 inches apart to give each plant room to grow.
Transplanting Seedlings
If starting from seeds indoors, transplant seedlings when they have at least 2-3 true leaves.
- Hardening Off: Before transplanting, harden off by placing seedlings outdoors for a few hours each day, gradually increasing exposure over a week.
- Transplanting: After the danger of frost has passed, transplant seedlings into prepared soil.
Step 4: Care and Maintenance
Watering
Sorrel loves moisture, but be careful not to overwater.
- Frequency: Water deeply once a week or when the top inch of soil feels dry.
- Mulching: Apply a layer of organic mulch to retain moisture and suppress weeds.
Fertilizing
Sorrel doesn’t require heavy fertilization but benefits from a light feeding.
- Organic Options: Use organic fertilizers like fish emulsion or sea kelp every 4-6 weeks during the growing season.
- Compost: Incorporate compost into your soil in the spring for continuous nourishment.
Pest and Disease Control
Sorrel is generally resistant to pests, but it’s not entirely free from threats.
- Common Pests: Watch out for aphids, cutworms, and slugs. Use neem oil or insecticidal soap for pests if necessary.
- Diseases: Monitor for signs of root rot, which can occur in overly wet conditions. Make sure to plant in well-draining soil.
Step 5: Harvesting Sorrel
When to Harvest
The best time to harvest sorrel is when the leaves are young and tender. Look for leaves that are 6-10 inches long.
- Timing: Begin harvesting in late spring and continue throughout the summer.
- Frequency: Regularly cut leaves to encourage further growth.
How to Harvest
- Cutting Method: Use scissors to snip leaves about 1 inch from the base. This helps to stimulate new growth and prevents damage to the plant.
- Avoiding Flowering: Regular harvesting will reduce the risk of the plant bolting. If you notice flower stalks, pinch them off promptly.
Step 6: Culinary Uses for Sorrel
Sorrel’s distinct flavor can elevate many dishes.
Raw Applications
- Salads: Combine fresh sorrel with other greens or use it as a standalone salad green.
- Herb Pesto: Blend sorrel with nuts, garlic, and olive oil for a unique pesto.
Cooked Dishes
- Soups: Add sorrel to creamy soups or broths for a tangy twist.
- Sauces: Use sorrel in sauces for fish or chicken, or mix with cream for a luscious dressing.
Preservation Techniques
Though sorrel is best enjoyed fresh, you can preserve it for later use.
- Freezing: Blanch leaves and freeze in airtight containers for up to 6 months.
- Drying: Although not commonly dried, sorrel can be hung in a dark, dry place for later use.
Step 7: Overwintering Sorrel
Sorrel is a perennial herb, meaning it can survive through winter.
- Mulching: Apply a thick layer of mulch in colder climates for insulation.
- Cutting back: Trim back any dying foliage at the end of the growing season to make way for new growth in spring.
Conclusion
Growing sorrel is a rewarding endeavor for both novice and experienced gardeners. With its hardy nature, tangy taste, and nutritional benefits, this herb can enhance your garden and your meals. By following the steps outlined in this guide, you can enjoy a bountiful harvest of fresh sorrel that brings a unique flavor to your kitchen. Whether tossed in a salad or simmered in a soup, sorrel is sure to impress.
Happy gardening, and enjoy your tangy greens!