Bottle gourd (Lagenaria siceraria), also known as calabash or white-flowered gourd, is a versatile and nutritious vegetable widely cultivated in many parts of the world. It belongs to the cucurbit family, which includes cucumbers, melons, and pumpkins. Growing bottle gourd vertically using a trellis support method is an efficient and effective way to maximize garden space, improve air circulation, and ease harvesting. This article provides a comprehensive guide on how to train bottle gourd vines using the vertical trellis support method.
Why Use the Vertical Trellis Support Method?
Before delving into the step-by-step process, it’s important to understand the benefits of growing bottle gourd on a vertical trellis:
-
Space Efficiency: Bottle gourd vines can grow vigorously and take up a lot of horizontal space if allowed to sprawl on the ground. Vertical trellising allows gardeners to grow more plants in less space.
-
Improved Air Circulation: Raising the vines off the ground improves airflow, reducing the risk of fungal diseases such as powdery mildew and downy mildew.
-
Better Sunlight Exposure: Vines trained vertically receive better sunlight, promoting photosynthesis and healthy growth.
-
Ease of Harvesting: Fruits hanging vertically are easier to see and pick compared to those lying on the ground. This reduces the risk of damage and rotting.
-
Cleaner Fruit: Keeping gourds off the soil prevents contact with soil-borne diseases and dirt, resulting in cleaner fruits.
Now let’s explore the steps to successfully train bottle gourd vines using vertical trellising.
Step 1: Selecting the Right Location
Bottle gourd plants thrive in warm, sunny locations that receive at least 6 to 8 hours of direct sunlight daily. Choose an area with well-draining soil rich in organic matter. Avoid low-lying areas prone to waterlogging, as bottle gourds do not tolerate soggy soil.
Step 2: Preparing the Soil
Prepare the soil before planting by loosening it to a depth of 12 to 15 inches to allow unrestricted root growth. Mix in ample organic compost or well-rotted manure to enhance soil fertility and moisture retention. The ideal soil pH for bottle gourd ranges from 6.0 to 7.5.
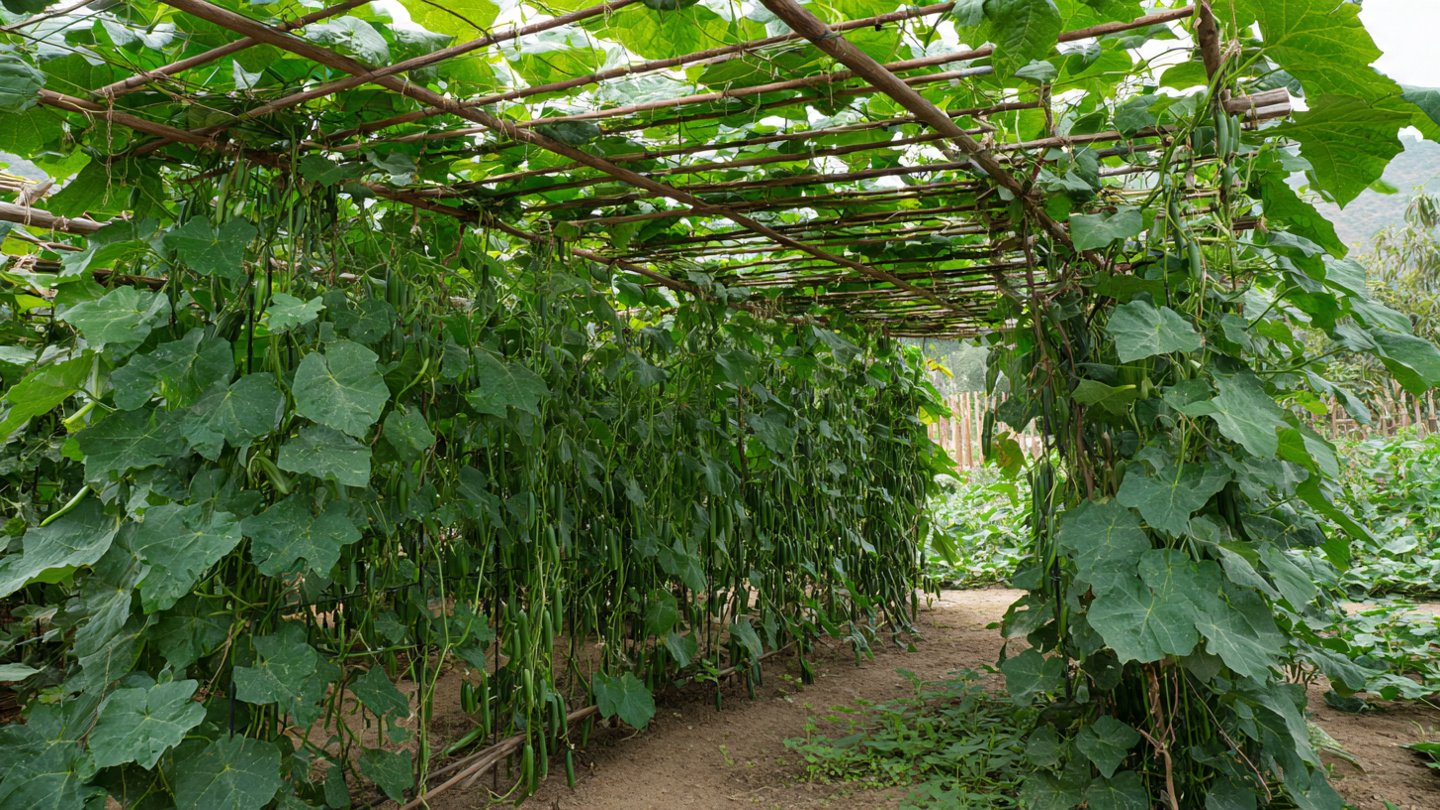
Step 3: Selecting the Trellis
Choosing a sturdy trellis is essential to support the vigorous growth and weight of bottle gourd vines and fruits. Several types of trellises can be used:
- Wooden Frame Trellis: Constructed with wooden posts and crossbars, this type is durable and stable.
- Wire Mesh or Chicken Wire Trellis: A wire mesh attached to sturdy posts serves as an excellent climbing surface.
- Bamboo or Reed Trellis: Lightweight and eco-friendly, bamboo poles can be arranged in a teepee or A-frame shape.
- String or Twine Trellis: Strings tied between overhead support beams or poles provide vertical climbing paths.
The dimensions should be at least 6 to 8 feet tall and 3 to 4 feet wide to accommodate mature vines.
Step 4: Planting Bottle Gourd Seeds or Seedlings
Bottle gourd can be grown from seeds or seedlings started indoors. Plant the seeds or seedlings approximately 3 inches away from the base of the trellis to allow the roots to develop.
- Seed Depth: Sow seeds about 1 to 2 inches deep.
- Spacing: Maintain spacing of 2 to 3 feet between plants to provide enough room for airflow and growth.
Water thoroughly after planting to promote germination.
Step 5: Training the Young Vines
Once the seeds germinate and vines start growing, early training is crucial to guide the young shoots to climb the trellis.
- Initial Support: Gently wrap the young vine around the trellis or provide loose ties made of soft twine or cloth to secure the vine without damaging it.
- Direction: Encourage upward growth by gently twisting the vine clockwise or counterclockwise depending on the natural curling direction.
- Pinch Tips: When the vine reaches the top of the trellis, pinch the growing tip to encourage lateral branching and more flowering sites.
Step 6: Maintenance of Vertical Trellis-Grown Bottle Gourd
Ongoing care is essential to maintain healthy vines and promote fruit production.
- Watering: Consistent watering is key, especially during flowering and fruit development. Avoid waterlogging but keep the soil moist.
- Mulching: Apply organic mulch around the base to retain soil moisture and suppress weeds.
- Fertilizing: Use balanced fertilizers rich in nitrogen during the early growth stage and switch to phosphorus and potassium during flowering and fruiting.
- Pruning: Remove dead or diseased leaves and excessively long runners to improve air circulation and light penetration.
- Pest and Disease Control: Monitor regularly for pests such as aphids, beetles, and caterpillars. Use organic or chemical controls as needed.
Step 7: Harvesting Fruits
Bottle gourds are usually ready for harvest 70 to 100 days after planting, depending on the variety. Harvest the fruits when they are young and tender for the best flavor and texture.
- Check for the light green color and firm but tender texture.
- Use sharp pruning shears or knives to cut the fruit from the vine carefully.
- Avoid pulling or twisting to prevent damage to the vine.
Additional Tips for Success
- Companion Planting: Grow bottle gourd alongside beans or corn for mutual benefits.
- Pollination: Bottle gourds rely on insect pollinators. Encourage pollinators by planting flowers nearby and minimizing pesticide use.
- Support for Heavy Fruits: Use slings or nets to support heavy fruits hanging on the trellis to prevent vines from breaking.
Conclusion
Training bottle gourd vines using the vertical trellis support method is an excellent gardening practice that offers numerous benefits including space-saving, disease reduction, and easier harvesting. By carefully selecting a suitable site, preparing the soil, constructing a sturdy trellis, and diligently training the vines, gardeners can enjoy healthy bottle gourd plants and abundant harvests. With proper maintenance, vertical trellising can make growing bottle gourds a rewarding and enjoyable experience both for home gardeners and commercial growers alike.