
Air layering is one of the most powerful and reliable plant-propagation techniques every gardener should know. Unlike traditional cuttings that may struggle to root, air layering allows you to grow a fully developed, ready-to-plant sapling while still attached to the mother plant. This method ensures faster growth, stronger roots, and a much higher success rate—perfect for fruit trees, ornamentals, and indoor plants.
If you want to multiply your favorite plants without waiting months for seeds or risking failure with cuttings, air layering is a game-changing technique.
In this complete guide, you’ll learn:
What air layering is
Its benefits over other propagation methods
Best plants suited for air layering
Exact step-by-step instructions
Best time, soil mix, and aftercare tips
Common mistakes and how to avoid them
Let’s begin!
What Is Air Layering?
Air layering is a propagation technique where you cause a part of a plant stem or branch to grow roots while it’s still attached to the parent plant. Once the roots develop, you simply cut the branch below the new root ball and plant it as a new tree.
Think of it as “creating a new plant in the air.”
You don’t need to remove the branch completely—you just encourage root formation at one point on it.
This method has been used for thousands of years in Asia to grow fruit trees with 90–100% success, and it works exceptionally well for harder-to-root species like:
- Mango
- Guava
- Lemon
- Lychee
- Pomegranate
- Ficus
- Hibiscus
- Bougainvillea
- Rubber plant
- Jasmine
- Longan
And many more!
Why Choose Air Layering Over Other Methods?
Air layering comes with several impressive advantages:
1. Very High Success Rate
Since the branch stays connected to the plant, it continues to receive water and nutrients, which helps roots form easily.
2. Faster Growth
Air-layered plants already have a developing root system before being cut off, so they establish quickly after planting.
3. Clone of the Mother Plant
You get an exact copy with the same fruit quality, color, taste, and growth habit.
4. No Need for Rooting Hormones
Although optional, they are not necessary.
5. Works on Mature Plants
Even old, woody plants can be propagated successfully.
Best Time for Air Layering
Timing plays an important role. The ideal period is during:
Early monsoon
Late spring
Early summer
These seasons provide ample humidity and warmth, which speeds up root formation.
Avoid winter or extremely hot dry months because the branch tends to dry out.
Materials You Will Need
- Sharp knife or grafting blade
- Moist sphagnum moss or coco peat
- Plastic wrap or polythene
- Rope/twine or zip ties
- Aluminum foil (optional)
- Rooting hormone (optional)
- Clean cloth/towel
Having everything ready makes the process smooth and clean.
Step-by-Step Guide to Air Layering
Now let’s walk through the complete process in a simple and effective way.
Step 1: Choose the Right Branch
Select a healthy, mature branch:
- Pencil-thick or slightly thicker
- Flexible, not too woody
- Disease-free
- Ideally 1–2 years old
Branches with fresh new leaves root faster.
Step 2: Make a Clean Cut
There are two common methods:
Method 1: Ringing Method (Most Popular)
- Select a 2.5–3 cm section of the bark.
- Remove the outer bark completely by making two circular cuts and peeling off the bark between them.
- Scrape the green layer (cambium) lightly to prevent healing.
This encourages root formation instead of bark regrowth.
Method 2: Slit Method
- Make a 1-inch upward cut on the branch and insert a small toothpick.
- Keep the cut open.
- Apply rooting hormone if desired.
Step 3: Apply Rooting Hormone (Optional)
Although optional, using rooting hormone increases success and speeds up root growth.
Simply dust or apply gel around the exposed area.
Step 4: Prepare Moist Moss or Coco Peat
- Soak sphagnum moss or coco peat in water.
- Squeeze out excess moisture—it should be moist, not dripping.
This moisture is essential for root formation.
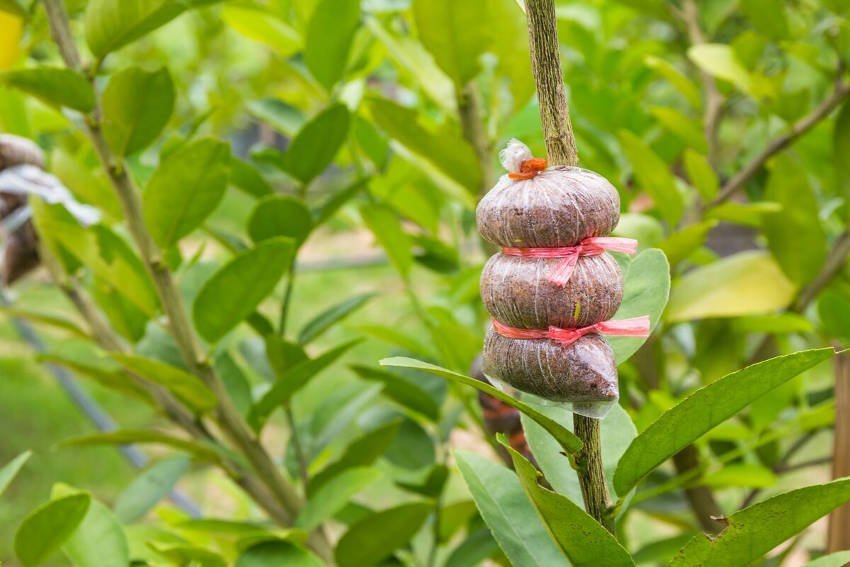
Step 5: Wrap the Moss Around the Cut
Take a handful of moist moss and wrap it around the exposed bark area.
Make sure:
- Moss covers the entire cut
- Thickness is 1.5–2 inches all around
- There are no gaps
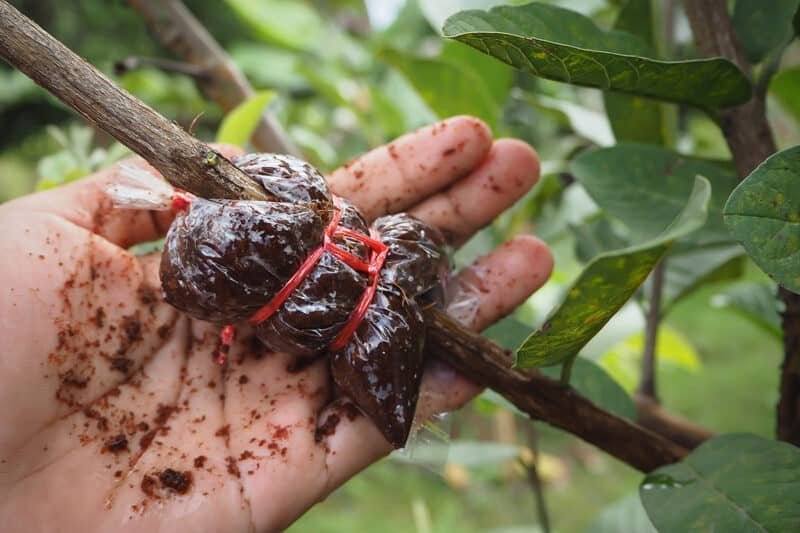
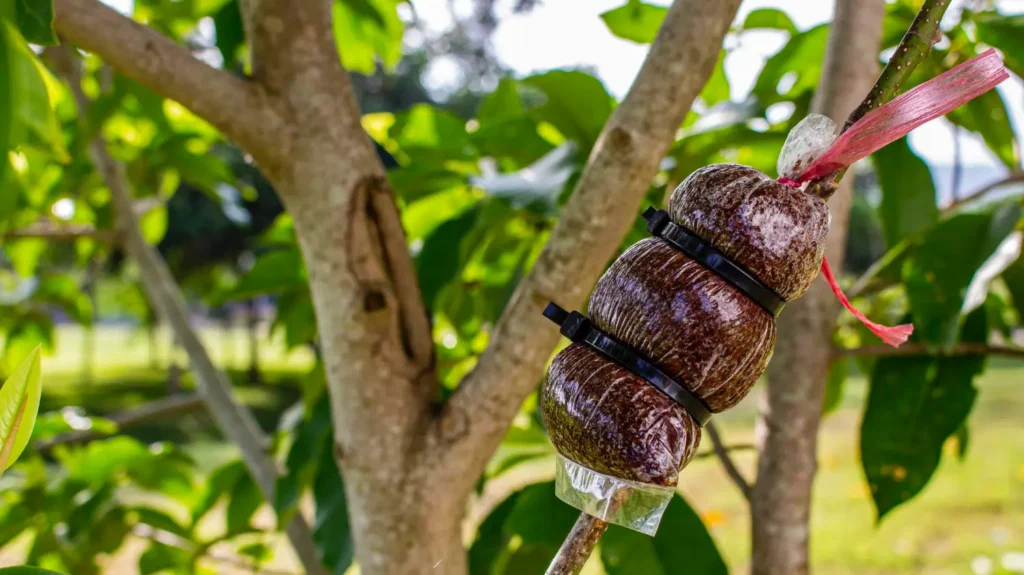
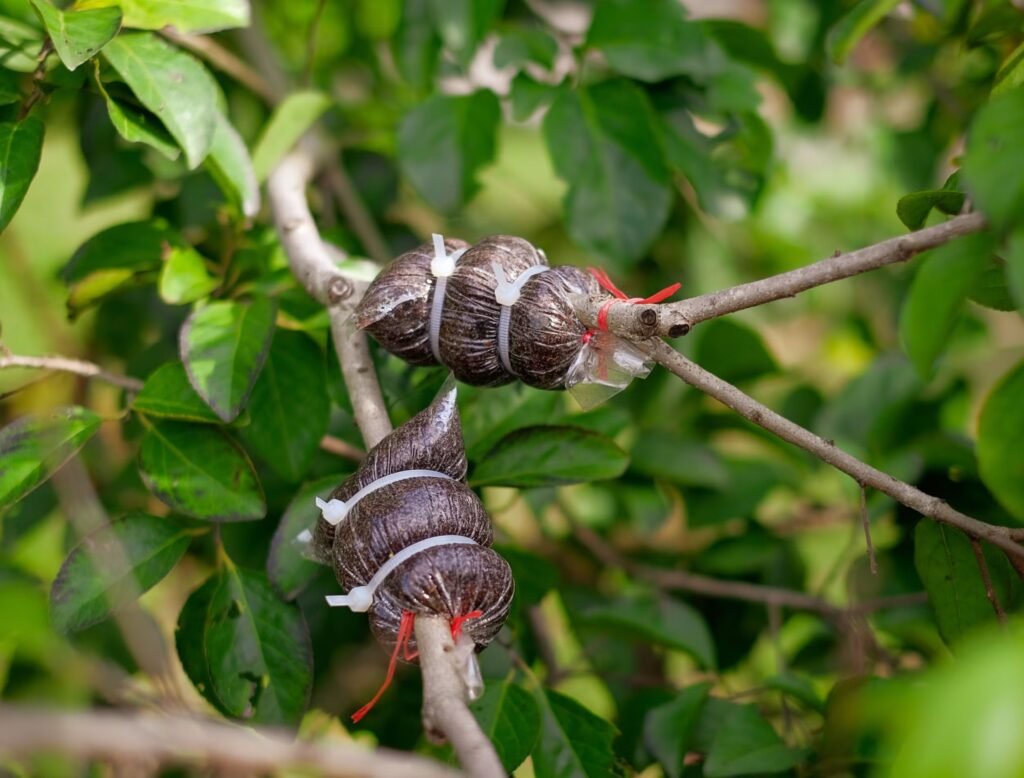
Step 6: Secure With Plastic Wrap
Wrap a piece of polythene tightly around the moss to seal in the moisture.
Tie both ends with:
- Rope
- Rubber bands
- Zip ties
After sealing, wrap aluminum foil around it to keep it cool and protect it from sunlight.
Step 7: Wait and Check for Root Growth
Roots usually appear within:
- 2–3 weeks for softwood plants like hibiscus
- 4–8 weeks for hardwood trees like mango, lemon, or guava
Check by gently opening a small part of the wrap or by observing if new leaves appear (a good sign of root activity).
If the moss looks dry, inject a little water using a syringe.
Step 8: Separate and Plant the New Sapling

Once you see thick, white roots inside the moss ball:
- Cut the branch just below the rooted area.
- Remove the plastic gently.
- Plant the new sapling into a pot or soil.
- Keep it in shade for 10–15 days.
- Water regularly but avoid overwatering.
Your new plant will begin growing vigorously within a few weeks!
Aftercare for Air-Layered Plants
To ensure strong growth after planting:
Keep the plant in partial shade
Direct sunlight may stress it initially.
Water moderately
Keep soil moist, not soggy.
Use a well-draining soil mix
Ideal mix: garden soil + coco peat + compost (1:1:1)
Apply liquid fertilizer
After 15 days, use mild organic fertilizer like:
- Cow dung liquid
- Seaweed extract
- Vermicompost tea
Protect from heavy wind
Young roots need stability.
Common Mistakes to Avoid

Most failures happen because of simple mistakes. Avoid these pitfalls:
Moss too dry
Roots cannot develop without constant moisture.
Using too young or too old wood
Select medium-aged branches.
Cutting too deep
Do not cut into the branch core.
Loose wrapping
Air gaps cause drying and failed rooting.
Removing too early
Wait until roots are clearly visible.
Best Plants You Can Multiply with Air Layering
Here are some excellent candidates:
Fruit Trees
- Mango
- Guava
- Lemon
- Pomegranate
- Lychee
- Sapota
- Fig
- Orange
- Plum
Flowering & Ornamental Plants
- Bougainvillea
- Hibiscus
- Ficus
- Rubber plant
- Croton
- Jasmine
- Adenium
Almost any woody plant can be propagated using this method—making it one of the most universal techniques in gardening.
Final Thoughts
Air layering is a magical yet simple technique that transforms your gardening experience. Whether you want to grow more fruit trees, gift plants to friends, or expand your home garden, this method gives you:
- Fast results
- Reliable rooting
- Strong plants
- High success rate
Once you start air layering, you’ll realize it’s one of the easiest and most rewarding ways to propagate plants.