Air layering is one of the most powerful plant propagation techniques used by gardeners, horticulturists, and nurseries around the world. Unlike cuttings, which often fail due to dehydration or infection, air layering encourages roots to grow while the branch is still attached to the parent plant. This results in stronger, healthier, and faster-growing new plants.
Whether you are propagating lemons, roses, guava, hibiscus, bougainvillea, mango, or ornamental trees, air layering delivers consistent results with a very high success rate. In this detailed 1200-word guide, we will explore everything you need to know—from the science behind air layering to step-by-step instructions and expert tips.
Introduction: What Is Air Layering and Why Is It So Effective?
Air layering, also called marcotting, is a propagation method where roots are induced to form on a branch while it remains attached to the parent plant. Once roots develop, the branch is cut and planted as an independent plant.
Advantages of Air Layering
- Very high success rate (80–95%)
- Produces strong plants with a ready root system
- Faster fruiting compared to cuttings
- Works for difficult-to-root plants
- Less risk of wilting
- No need for fancy equipment
- Ideal for woody and perennial plants
Because the branch remains nourished by the parent plant until roots form, it avoids stress and dehydration—common problems in other propagation techniques.
Plants That Can Be Propagated by Air Layering
Air layering works exceptionally well for:
- Lemon and orange
- Mango
- Guava
- Roses
- Hibiscus
- Bougainvillea
- Jackfruit
- Custard apple
- Peepal
- Rubber plant
- Dracaena
- Orchid
- Ficus
- And many ornamental shrubs
This technique is especially useful for plants with woody stems that do not root easily from cuttings.
The Science Behind Air Layering
When a branch is wounded (by removing a ring of bark), the plant responds by producing:
- Callus tissue
- Root primordia (root buds)
- Auxins (rooting hormones)
Auxins accumulate at the wounded site because they cannot flow downward due to the bark removal.
This concentration stimulates root formation.
By keeping the wound moist and oxygenated, roots grow outward into the surrounding medium.
Materials Needed for Air Layering
You do NOT need expensive materials. Air layering can be done with simple items:
- Sharp knife or pruning shears
- Rooting hormone (optional but improves success)
- Moist sphagnum moss or cocopeat
- Plastic wrap / polybag
- Twine or rubber band
- Aluminum foil (optional)
- Water
- Clean cloth
Using clean tools reduces infection and improves rooting success.
Step-by-Step Guide: How to Air Layering (Professional Method)
Below is the complete process used by nurseries and experts.
Step 1: Choose the Right Branch
Select a branch that is:
- 1–2 cm thick
- Healthy and disease-free
- Semi-hardwood (not too soft, not too hard)
- Located 30–60 cm above the ground
Avoid:
- Very young shoots
- Old woody branches
- Weak or damaged stems
Semi-hardwood branches root best.
Step 2: Make a Clean Ring Cut
Using a sharp knife:
- Remove a 1-inch (2–3 cm) ring of bark
- Cut down to the wood
- Remove all bark completely
- Scrape lightly to prevent healing
This cut interrupts the downward flow of hormones and encourages root formation.
💡 Tip:
A clean, smooth cut prevents infection and promotes faster rooting.
Step 3: Apply Rooting Hormone (Optional but Highly Recommended)
Dip the exposed wood in:
- IBA powder
- NAA
- Or natural alternatives like honey or aloe
Hormones boost root growth dramatically and shorten rooting time.
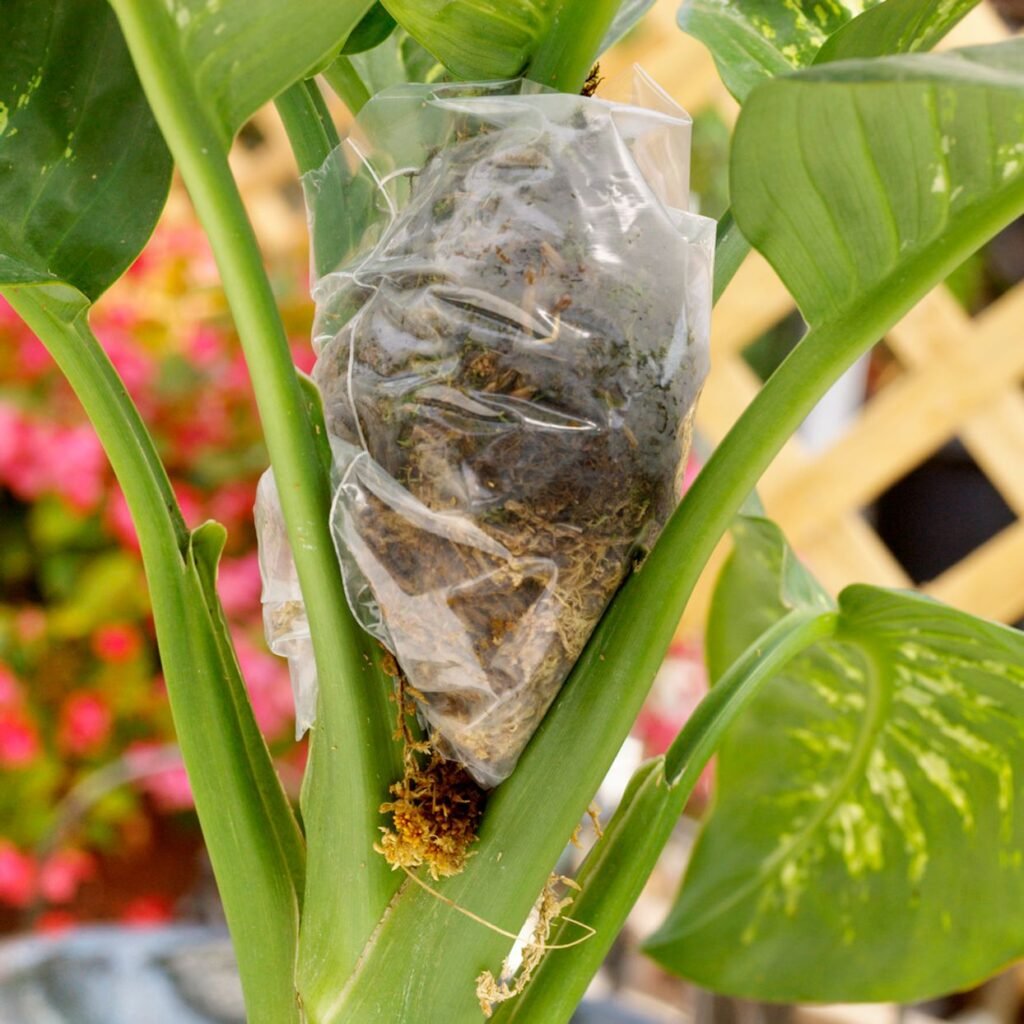
Step 4: Wrap Moist Moss or Cocopeat
Take a handful of:
- Sphagnum moss
- Cocopeat
- Or a mixture
Moisten it, but do not make it dripping wet.
Wrap it tightly around the wounded ring so it covers the entire area.
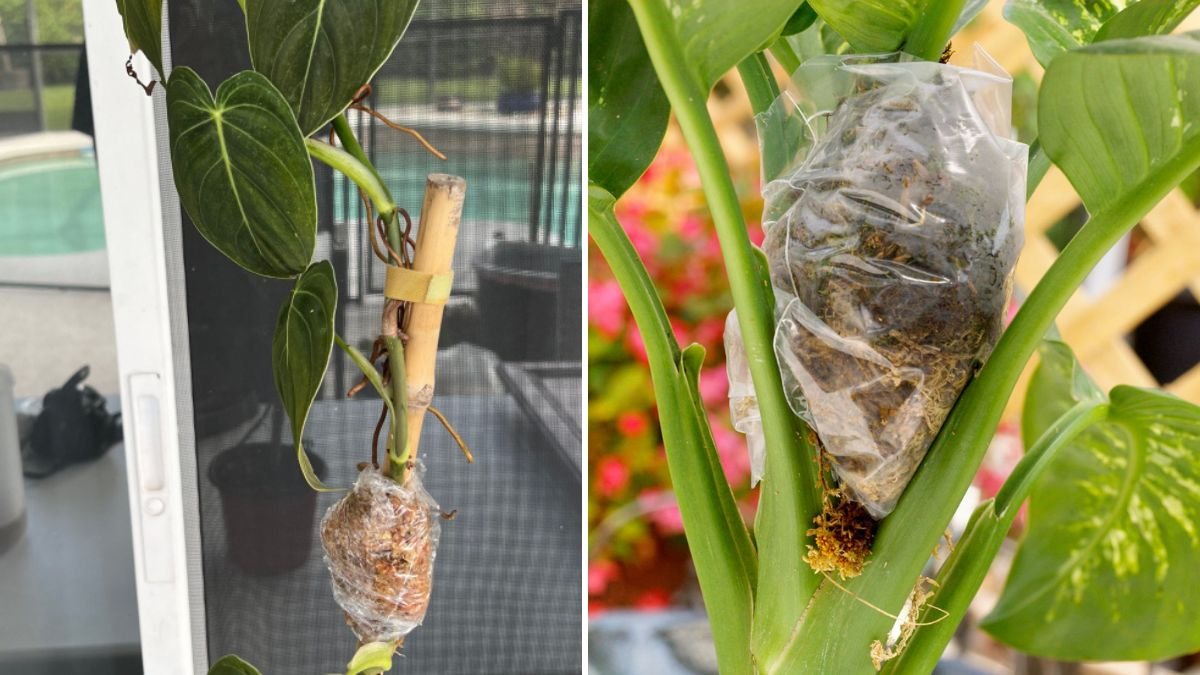
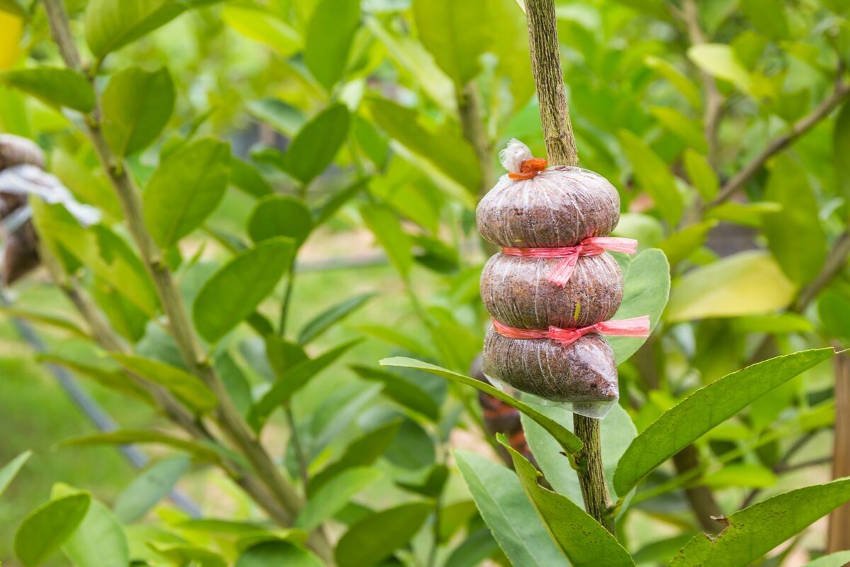
Step 5: Cover With Plastic
Cover the moss with:
- A plastic sheet
- A polybag
- Or cling film
Ensure:
- No gaps
- No air pockets
- Moisture is trapped
This creates a miniature greenhouse around the wound.
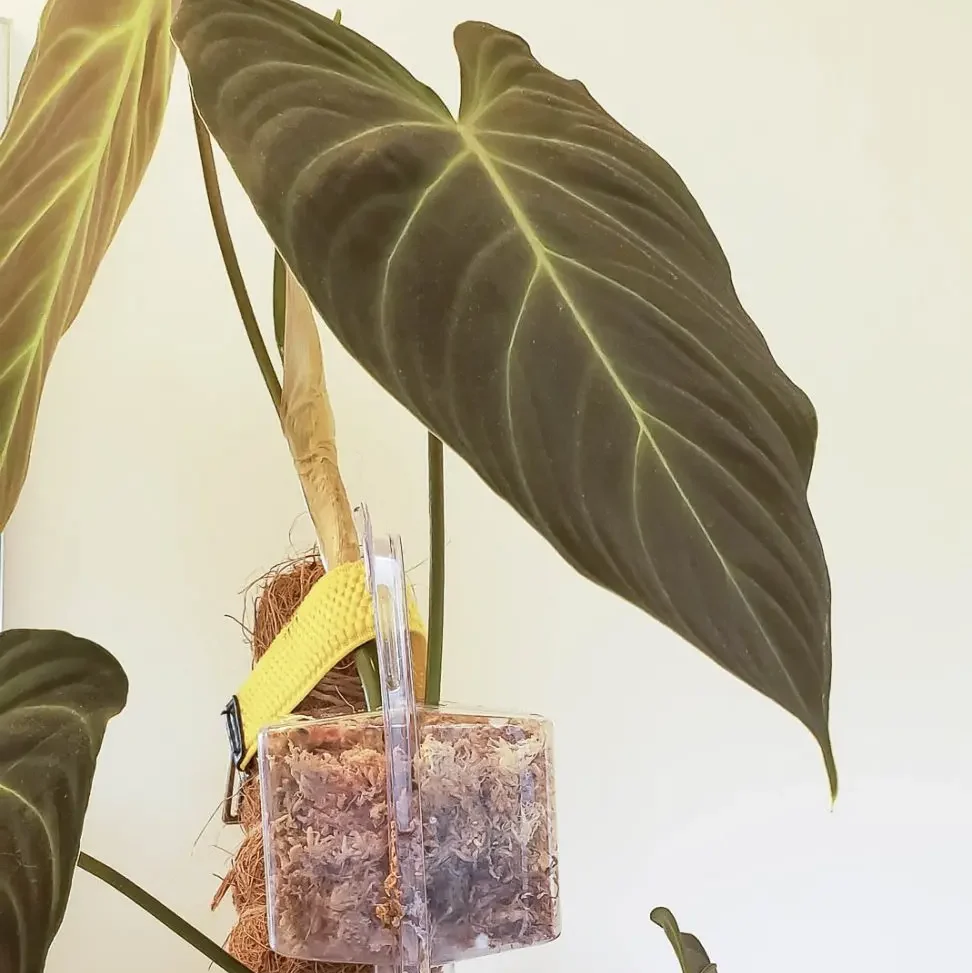
Step 6: Secure With Twine
Tie both ends tightly with:
- Strings
- Rubber bands
- Wire
- Twine
The wrap must remain stable for several weeks.
Step 7: Protect From Sunlight
Cover the plastic with aluminum foil or opaque material.
Why?
- Prevents overheating
- Keeps roots dark (roots grow better in darkness)
- Reduces algae formation
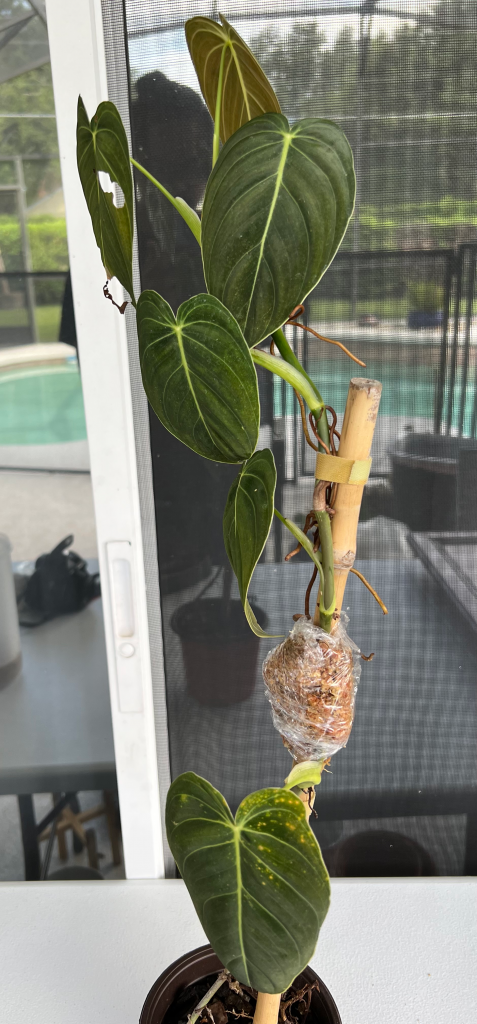
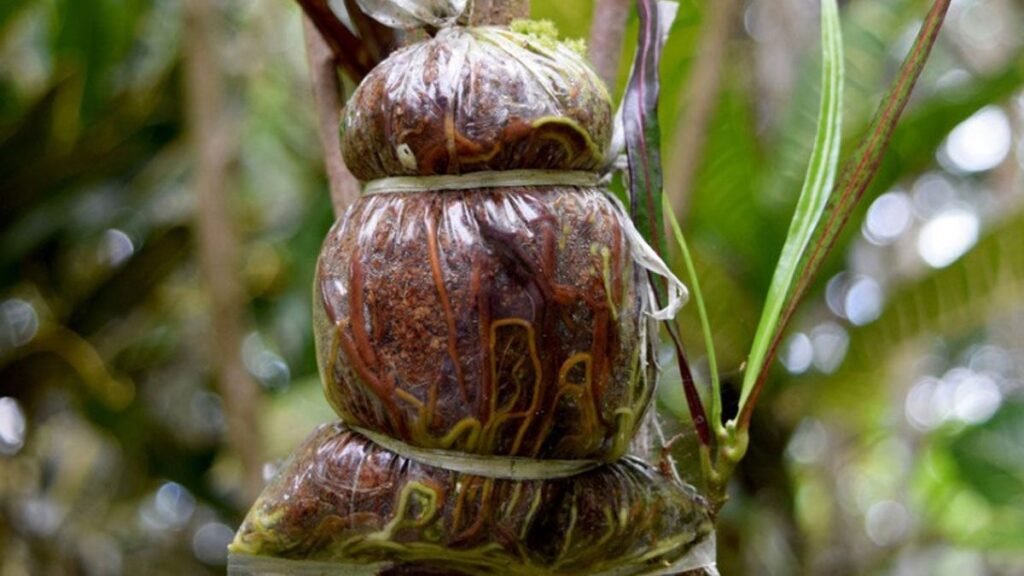
Step 8: Wait for Roots to Form
Root formation usually takes:
- 3–6 weeks for fast-rooting plants
- 6–10 weeks for woody trees
Signs that roots have formed:
- Swelling of the wrapped area
- Roots visible through transparent plastic
- Moss feels firm
- Branch remains healthy
You can gently press the wrap to feel the root mass.
Step 9: Cut the Branch
Once roots are visible and dense:
- Cut the branch 2–3 cm below the root ball
- Avoid damaging roots
- Remove the plastic carefully
Step 10: Plant in a Pot
Use a pot with:
- Good drainage
- Mix of sand + compost + cocopeat
- Moist but not soggy soil
Place the plant in:
- Shade
- Indirect sunlight
- Humid environment
Water lightly.
Step 11: Care for the New Plant
For the first 2–3 weeks:
- Keep soil slightly moist
- Avoid direct sunlight
- Keep humidity high
- Do not fertilize immediately
Once the plant stabilizes:
- Introduce sunlight gradually
- Start normal watering
- Apply organic fertilizer
Why Air Layering Is Better Than Cuttings
| Air Layering | Cuttings |
|---|---|
| Roots before cutting | Must root after cutting |
| Strong plant | Weak plant |
| High survival | Many fail |
| Faster establishment | Slow |
| Works for woody plants | Often fails |
| Less stress | High stress |
Air layering offers professional-level results with simple tools.
Expert Tips for Maximum Success
✅ Use fresh, healthy branches
✅ Keep moss moist, not wet
✅ Avoid rain entering the wrap
✅ Keep the layer shaded
✅ Use clean tools
✅ Apply rooting hormone
✅ Do not disturb the layer
✅ Wait until roots are well-developed
Common Mistakes and Solutions
Moss dries out
✅ Re-moisten gently
Wrap is loose
✅ Retighten
Too much water
✅ Remove excess moisture
Cut too deep
✅ Trim carefully
Roots not forming
✅ Use hormone
✅ Choose a younger branch
✅ Propagate in warm weather
Best Seasons for Air Layering
- Spring
- Early summer
- Monsoon
Warm temperatures + humidity = faster rooting.
Conclusion: Air Layering Is One of the Best Propagation Techniques
Air layering stands out as an excellent, reliable, and beginner-friendly method. It combines simplicity with professional results, producing robust plants that establish quickly and fruit earlier.
With the right technique, even difficult plants like lemons, roses, guava, and bougainvillea can be propagated easily.
By following this guide—choosing the right branch, making clean cuts, maintaining humidity, and waiting patiently—you can create strong new plants with a success rate far above ordinary cuttings.
Air layering is not just a technique; it is a gateway to multiplying plants effortlessly and sustainably.