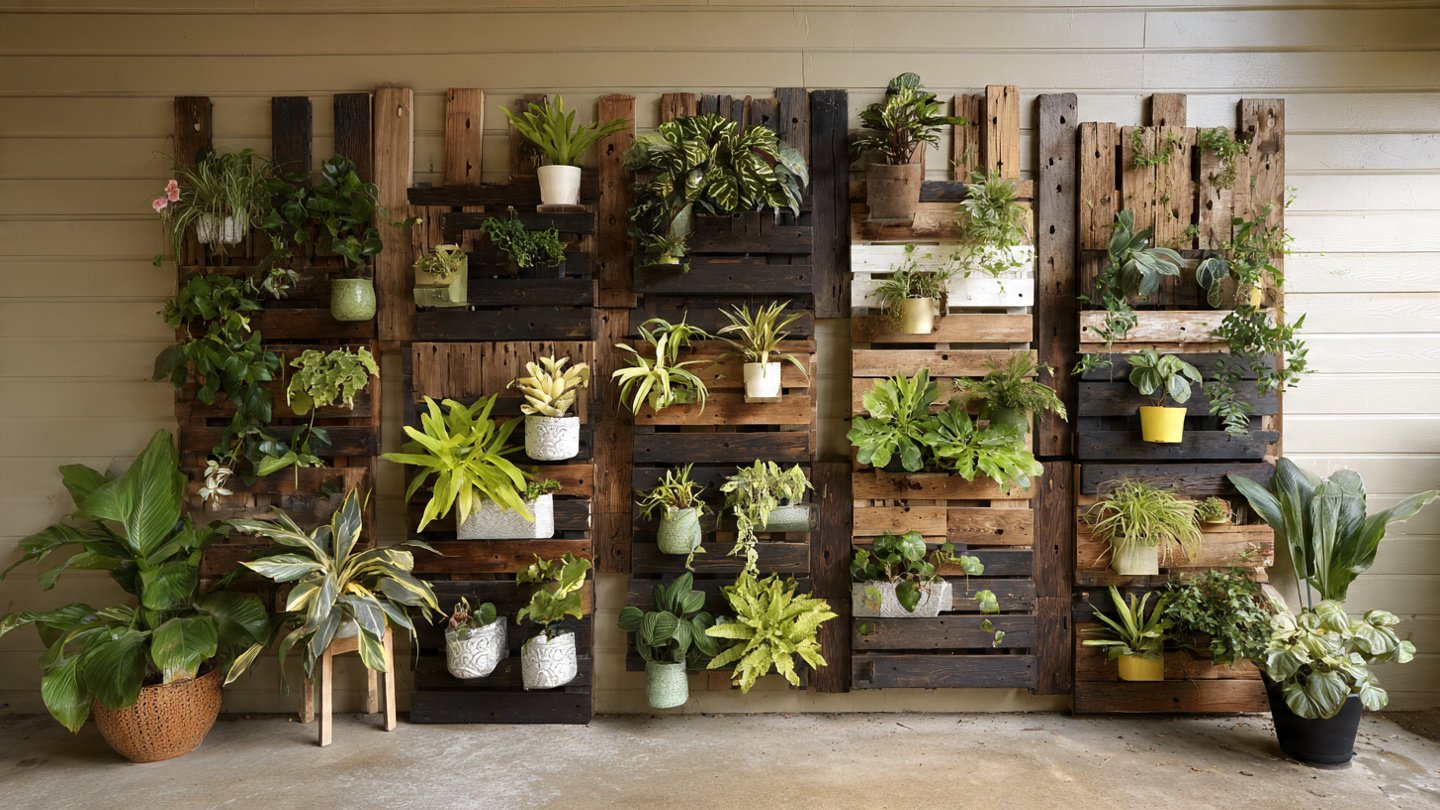
If you’re looking for a unique way to beautify your garden or balcony while making good use of scrap wood, creating a vertical planter is a fantastic project. This not only helps in using materials that might otherwise go to waste, but it also provides an inventive solution for growing flowers, herbs, or vegetables in a limited space. Here’s a comprehensive guide on how to transform scrap wood into a stunning vertical planter.
Materials You Will Need
- Scrap wood (pallets, old fence boards, or any untreated wood)
- Wood screws
- Drill with drill bits
- Saw (hand saw or power saw)
- Sandpaper or a sander
- Wood preservative or outdoor paint (optional)
- Landscape fabric or burlap
- Soil suitable for the plants you are growing
- Plants or seeds of your choice
- Measuring tape
- Pencil
Step-by-Step Instructions
1. Design Your Vertical Planter
Begin by sketching a design for your vertical planter. Think about how many plants you want to accommodate and the overall structure you envision. Consider dimensions that will fit your available space. A common design is to create a series of stacked boxes or pockets that can snugly hold pots or growing media.
2. Cut the Wood
Using your saw, cut the scrap wood according to the measurements of your design. If you’re making a tiered planter, create larger pieces for the base and smaller ones for each level. Remember to wear protective gear while cutting.
3. Sand the Edges
Once your pieces are cut, use sandpaper or a sander to smooth any rough edges. This not only ensures safety but also enhances the aesthetics of your planter.
4. Assemble the Planter
Now it’s time to assemble your vertical planter. Start with the base piece and gradually add each level, securing them with wood screws. Ensure that each layer is level and securely attached to prevent it from tilting or collapsing.
Example of assembly:

Base

|

Level 1

|

Level 2

|

Level 3
5. Add Drainage Holes
Before proceeding, drill small drainage holes in the bottom of each planter section to ensure proper drainage. This will prevent water from pooling, which can lead to root rot in plants.
6. Line with Landscape Fabric
Cut pieces of landscape fabric or burlap and line the inside of the planter areas. This helps retain soil while allowing excess water to drain. Secure the fabric with a staple gun or small screws.
7. Paint or Treat the Wood (Optional)
If you want to add some color or protection, apply wood preservative or outdoor paint. Make sure to use non-toxic products if you are growing edible plants. Allow it to dry completely before proceeding.
8. Fill with Soil
Fill each section with suitable potting soil. Be generous, but ensure that there’s enough space for plant roots. Mix in compost for extra nutrients if desired.
9. Plant Your Chosen Flora
Now comes the fun part! Plant your chosen flowers, herbs, or vegetables. Make sure to consider the sunlight requirements of each plant when deciding their placement. Taller plants should go at the top, with trailing plants hanging over the edges for added appeal.
10. Position the Vertical Planter
Choose an appropriate location for your new vertical planter. Ensure it receives adequate sunlight and is protected from strong winds. You may want to anchor it to a wall for stability, especially if it is tall.
Maintenance Tips
Your vertical planter should require minimal maintenance, but here are a few tips to ensure it thrives:
- Watering: Check the moisture level regularly and water as necessary. Make sure to water deeply and avoid getting water on the foliage to minimize fungal issues.
- Fertilizing: Feed your plants with a balanced fertilizer every few weeks, especially during growing season.
- Pest Control: Keep an eye out for pests and treat them promptly using organic methods when possible.
- Pruning: Regularly prune your plants to promote healthy growth and prevent overcrowding.
Conclusion
Transforming scrap wood into a stunning vertical planter is a rewarding project that combines creativity with sustainability. Not only does it help save the environment by reusing materials, but it also allows you to grow beautiful plants in a limited space. By following these steps, you can create a unique addition to your home or garden that reflects your personal style and passion for gardening.
FAQs
1. Can I use treated wood for my vertical planter?
It’s best to avoid treated wood for planters where you will grow edible plants, as chemicals can leach into the soil. Untreated wood is a safer choice.
2. What types of plants are best for vertical planters?
Herbs, trailing flowers, and small vegetables like lettuce or strawberries work well. Choose plants that can thrive in the sunlight and conditions of your chosen location.
3. How long will the wood last outdoors?
Wood durability depends on the type of wood and environmental factors. Untreated wood typically lasts 3-5 years, while treated wood can last much longer. Regular maintenance can extend its life.
4. Can I move the vertical planter once it’s built?
It’s best to place the planter in its permanent location before filling it with soil, as it can be heavy when filled. If you need to move it, ensure it is securely anchored and consider lighter materials.
5. How often should I water my vertical planter?
Watering frequency depends on the plants and climate, but generally, check daily during hot weather. Ensure the soil is moist but not soggy.