Bromeliads are a stunning family of plants that offer striking blooms and vibrant foliage, making them popular choices for indoor gardening. With a little care and the right techniques, you can successfully grow these easy-care, tropical plants indoors. This article discusses the best practices for growing indoor bromeliad flowers successfully, including essential growing conditions, watering tips, fertilization, propagation methods, and common pests and problems.
Understanding Bromeliads
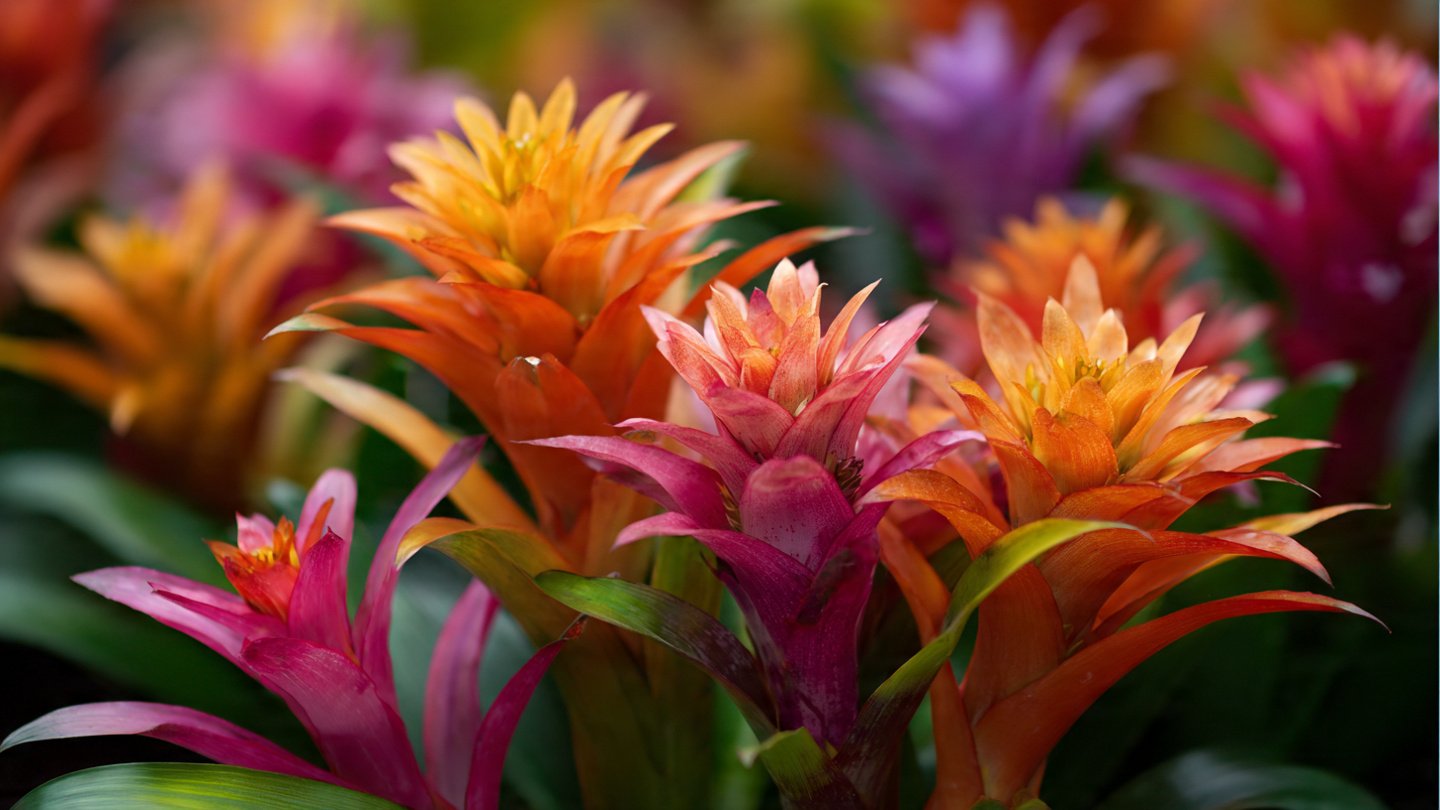
Before diving into the specifics of care, let’s understand what bromeliads are. These fascinating plants belong to the Bromeliaceae family and include over 3,000 species, each boasting unique characteristics. Some popular varieties for indoor gardening are the Guzmania, Aechmea, and Neoregalia. They’re known for their rosette shape, vibrant inflorescences, and adaptability to diverse environments.
Choosing the Right Variety
When it comes to growing indoor bromeliads successfully, the first step is choosing the right variety suited for indoor conditions. Look for types like:
- Guzmania: Known for its bright colors and long-lasting flowers.
- Aechmea: Features a distinctive shape and can tolerate lower light conditions.
- Neoregalia: Often exhibits mesmerizing patterns and colors on its leaves.
Choose a variety based on your aesthetic preference and the specific light conditions in your home.
Optimal Growing Conditions
1. Light
Bromeliads thrive in bright, indirect light. Direct sunlight can scorch their leaves, while insufficient light will cause them to become leggy and struggle to flower. Here are some lighting tips:
- East or West Facing Windows: Ideal for most bromeliads; they provide ample indirect light.
- Use Sheer Curtains: If sunlight is too intense, use sheer curtains to filter the light.
- Grow Lights: For low-light areas, consider using grow lights to supplement natural light.
2. Temperature and Humidity
Bromeliads prefer warm temperatures and high humidity. Here’s how to create an ideal environment:
- Temperature Range: Keep temperatures between 60°F (16°C) and 80°F (27°C). Avoid drafts and sudden temperature changes.
- Humidity Levels: Aim for relative humidity between 50-70%. If your home is dry, especially during winter, consider using a humidifier, placing a tray filled with water and pebbles beneath your bromeliad, or misting the leaves.
3. Soil
Choosing the right soil is crucial for bromeliad health. Use a well-draining potting mix. Here’s how to set it up:
- Bromeliad-Specific Mix: Consider purchasing a pre-made bromeliad potting mix which often includes orchid bark and perlite for proper aeration and drainage.
- DIY Mix: Create your own blend with equal parts peat moss, pine bark, and perlite to ensure good drainage.
Watering Techniques
Proper watering is one of the most crucial aspects of bromeliad care. These plants have a unique rosette structure that gathers water, allowing them to thrive in their natural environment. Follow these guidelines for effective watering:
1. Watering the Plant
- Watering the Cup: Fill the central cup of the rosette with distilled or rainwater. Change the water weekly to prevent stagnation and algae growth.
- Avoid Overwatering: Ensure that excess water drains away from the roots, as bromeliads are susceptible to root rot.
2. Soil Moisture
- Check Soil: Allow the soil to dry slightly between waterings. Stick your finger about an inch into the soil; if it feels dry, it’s time to water.
- Seasonal Adjustment: During the growing season (spring and summer), bromeliads require more frequent watering compared to the dormant months (fall and winter).
Feeding and Fertilization
Feeding bromeliads isn’t as straightforward as with most houseplants. Early summer is the best time to fertilize for optimal growth. Follow these tips:
1. Type of Fertilizer
- Use Liquid Fertilizer: A balanced, water-soluble fertilizer diluted to half-strength is recommended.
- Apply Every 4-6 Weeks: During the growing season, fertilize every month. Skip fertilization in fall and winter.
2. Foliar Feeding
- Fertilize via Leaves: Bromeliads can absorb nutrients through their leaves. Misting the foliage with diluted liquid fertilizer can provide additional nourishment.
Repotting Bromeliads
Bromeliads generally do not require frequent repotting. However, if your plant outgrows its pot or if the mix has degraded, it’s time to repot. Consider these tips:
1. Time of Year
- Spring: The best time to repot your bromeliad is during the active growing season in spring.
2. Repotting Process
- Choose a Pot: Use a slightly larger pot with good drainage holes.
- Remove the Plant: Gently remove the bromeliad from its pot, being careful not to damage the roots.
- Inspect and Clean: Trim any dead or rotting roots before placing the plant in fresh potting mix.
- Water: Thoroughly water the new pot but avoid soaking the base of the rosette immediately after repotting.
Propagation Techniques
Bromeliads can be propagated easily through offsets, known as pups, that grow from the base of the parent plant. Here’s how to propagate successfully:
1. Timing
- Wait for Pups: Allow the mother plant to produce pups before attempting to propagate, which usually occurs after it has bloomed.
2. Removing and Planting Pups
- Cut the Pup: Use a clean, sharp knife to separate the pup from the mother plant when it’s at least 1/3 the size of the parent.
- Cure the Pups: Let the pup sit for a day or two to allow the cut end to dry and callous before planting.
- Use a Small Pot: Plant the pup in a small pot with a suitable mix, and care for it like a mature bromeliad.
Common Pests and Problems
Bromeliads can be susceptible to pests like mealybugs, aphids, and spider mites. Here are some tips to keep them healthy:
1. Identifying Pests
- Signs: Look for white, cottony masses (mealybugs) or small webbing (spider mites).
2. Treatment
- Natural Solutions: Use insecticidal soap or neem oil for treatment. For minor infestations, manually wipe pests off with a cotton swab dipped in alcohol.
- Prevention: Regularly inspect your plants, ensuring good air circulation around them.
3. Leaf Issues
- Yellowing Leaves: Often indicates overwatering. Adjust your watering schedule.
- Brown Leaf Tips: Can signal low humidity or underwatering; adjust accordingly.
Creating a Stunning Indoor Display
Bromeliads can serve as statement pieces in your indoor decor. Here’s how to make the most of their beauty:
- Group Plantings: Combine different bromeliad varieties to create an appealing display.
- Unique Containers: Use decorative pots, terrariums, or vertical planters for an artistic touch.
- Positioning: Highlight their vibrant colors by placing them near neutral backgrounds.
Conclusion
Growing indoor bromeliad flowers can be a rewarding gardening experience. By following these best techniques, you allow your bromeliads to thrive and bloom beautifully. Remember to choose the right variety, provide optimal growing conditions, water judiciously, and keep an eye on pest issues. With attention and care, you can enjoy the stunning beauty of bromeliad flowers in your home for years to come.
FAQs
1. How often should I water my indoor bromeliad?
Water your bromeliad once the top inch of soil feels dry. Additionally, keep the central cup filled with water, changing it weekly.
2. Can I use regular potting soil for bromeliads?
Regular potting soil is too dense for bromeliads. Opt for a well-draining mix, such as one specifically designed for bromeliads or a DIY mix with peat, pine bark, and perlite.
3. Why are the leaves of my bromeliad turning brown?
Brown tips could indicate low humidity or underwatering. Increase humidity and check your watering routine to correct this issue.
4. Do bromeliads require a lot of light?
Bromeliads prefer bright, indirect light. Direct sunlight can scorch their leaves, so select a suitable location with filtered sunlight.
5. How can I propagate my bromeliad?
To propagate, wait for pups to develop at the base of the mother plant. Cut the pup once it reaches about one-third the size of the parent and pot it in a small container.
By adhering to these guidelines and fostering a little patience and love, you can enjoy the beautiful blooms of bromeliads in your home, enriching your indoor space with their unique charm. Happy gardening!