Growing your own curry leaves (Murraya koenigii) indoors can be a delightful endeavor for culinary enthusiasts. Known for their aromatic scent and distinct flavor, curry leaves are a staple in Indian cuisine and can elevate many dishes. This article provides a comprehensive guide on how to successfully grow curry leaves indoors, ensuring that you have fresh leaves at your fingertips all year round.
Understanding Curry Leaves
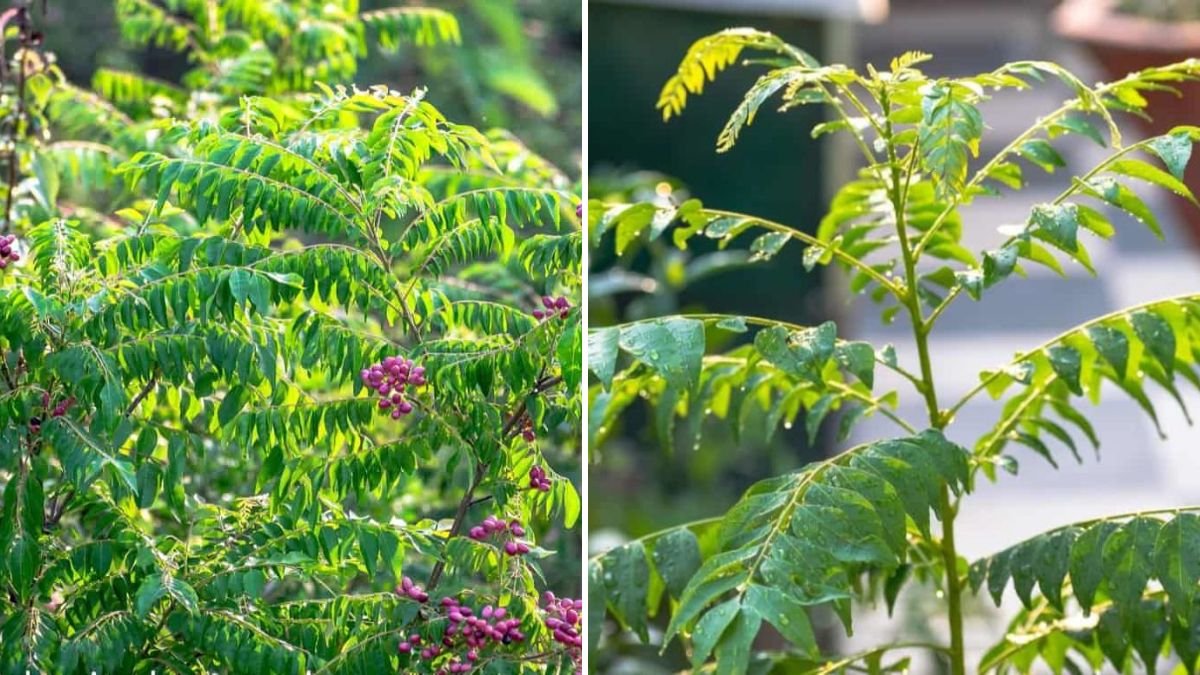
Curry leaves are the foliage of the curry tree, native to Southeast Asia. These leaves are not only prized for their unique flavor but also for their nutritional benefits, including antioxidants and vitamins. The leaves are typically used fresh, dried, or powdered in various dishes, contributing to curries, chutneys, and rice dishes.
Ideal Conditions for Growing Curry Leaves Indoors
1. Climate and Temperature
Curry trees thrive in warm climates, ideally between 70°F to 90°F (21°C to 32°C). They do not tolerate frost, so maintaining a consistent indoor temperature is crucial for healthy growth.
2. Light Requirements
Curry leaves require plenty of sunlight. Aim for at least 6-8 hours of direct sunlight daily. A south-facing window is ideal, but if natural light is limited, consider using grow lights.
3. Soil Type
A well-draining soil mix is essential to prevent root rot. A potting mix enriched with perlite or sand can facilitate drainage. You can also use a combination of potting soil, peat moss, and vermiculite for optimal results.
4. Humidity
Curry leaves prefer a humid environment. If your indoor air is too dry, consider using a humidity tray or a humidifier, especially during the winter months.
Growing Curry Leaves from Seeds or Cuttings
1. Choosing the Right Seeds
If starting from seeds, purchase high-quality seeds from a reliable source. Fresh seeds yield better results, so look for those harvested within six months.
2. Seed Germination
- Soak the Seeds: Soak the seeds in water for 24 hours to soften the outer shell.
- Planting: Sow the seeds in a pot filled with the prepared soil mix, about 1-2 inches deep. Water gently to avoid washing away the seeds.
- Covering: Cover the pot with plastic wrap or a clear lid to maintain moisture. Place it in a warm spot with indirect sunlight.
3. Growing from Cuttings
- Select Cuttings: Choose healthy, non-flowering stems from an established curry leaf plant. Ensure they are about 4-6 inches long.
- Preparing the Cuttings: Remove the lower leaves and dip the cut end in rooting hormone (optional) to promote root growth.
- Planting: Insert the cuttings into a well-draining soil mix and water them lightly. Cover with a plastic bag to maintain humidity.
Caring for Your Curry Leaf Plant
1. Watering
Curry leaves prefer consistently moist soil but do not like to be waterlogged. Water when the top inch of soil feels dry. During the growing season (spring and summer), watering frequency may increase.
2. Fertilizing
Use a balanced organic fertilizer every 4-6 weeks during the growing season. A fertilizer high in nitrogen can encourage lush, green growth. Reduce fertilizing in the fall and winter when plant growth slows down.
3. Pruning
Regular pruning encourages bushy growth and prevents the plant from becoming leggy. Remove any dead or yellowing leaves and trim back wayward stems. This process can stimulate new growth and enhance overall health.
4. Pest Management
Indoor plants can attract pests like spider mites, aphids, and mealybugs. Regularly inspect your curry leaf plant and treat infestations with natural insecticidal soap or neem oil. Maintaining proper humidity can also deter pests.
Harvesting Curry Leaves
Once your plant reaches a healthy size, you can start harvesting leaves. Begin by plucking the older leaves at the base of the stem, ensuring not to remove more than one-third of the plant at a time. This will encourage continued growth.
1. Storing Fresh Curry Leaves
Fresh curry leaves can last in the refrigerator for about a week. For longer storage, consider drying them. Spread leaves on a baking sheet and place them in a low-temperature oven for a few hours. Once dried, store them in an airtight container away from light.
2. Using Curry Leaves
Incorporate fresh curry leaves into your dishes by adding them during the cooking process. They can be sautéed in oil to release their flavor or added whole to soups and stews for a fragrant taste.
Troubleshooting: Common Issues When Growing Curry Leaves Indoors
- Yellowing Leaves: This can indicate overwatering or nutrient deficiency. Adjust your watering schedule and consider fertilizing.
- Leggy Growth: Insufficient light often causes leggy growth. Move your plant to a sunnier location or supplement with grow lights.
- Wilting Leaves: Check the soil moisture. If it’s too dry, water your plant. Conversely, overly saturated soil can cause wilting and root rot.
FAQs About Growing Curry Leaves Indoors
Q1: Can I grow curry leaves indoors all year round?
Yes, curry leaves can be successfully grown indoors year-round with proper care, including adequate light, warm temperatures, and humidity.
Q2: How long does it take for curry leaves to grow from seeds?
It typically takes about 2 to 3 weeks for curry seeds to germinate, and the plant may take several months to grow sufficiently for harvesting.
Q3: How often should I fertilize my curry leaf plant?
Fertilize every 4-6 weeks during the growing season (spring and summer), and reduce feeding during fall and winter.
Q4: Can I propagate curry leaves in water?
While it’s possible to propagate curry leaf cuttings in water, it’s generally more effective to root them directly in soil for better results.
Q5: What pests should I watch out for when growing curry leaves indoors?
Common pests include spider mites, aphids, and mealybugs. Regular inspection and treatment can help prevent infestations.
Q6: Can curry leaves thrive in low light conditions?
Curry leaves prefer bright, direct sunlight; while they may survive in low light conditions, their growth will be stunted, and the leaves may not develop as robust a flavor.
Conclusion
Growing fresh curry leaves indoors is a rewarding experience that adds both flavor and fragrance to your cooking. By understanding the needs of the plant and providing the right conditions, you can enjoy a continuous supply of this aromatic herb year-round. With patience and care, your indoor garden can flourish, making every meal a little more special.