Creating a tropical oasis in your backyard is a dream for many, and one of the most striking additions to this paradise is the Bottle Palm (Hyophorbe lagenicaulis). Known for its unique shape, which resembles a bottle, this palm adds a touch of elegance and a tropical flair to any landscape. In this comprehensive guide, we will take you through everything you need to know about cultivating Bottle Palms successfully.
Understanding the Bottle Palm
Origin and Characteristics
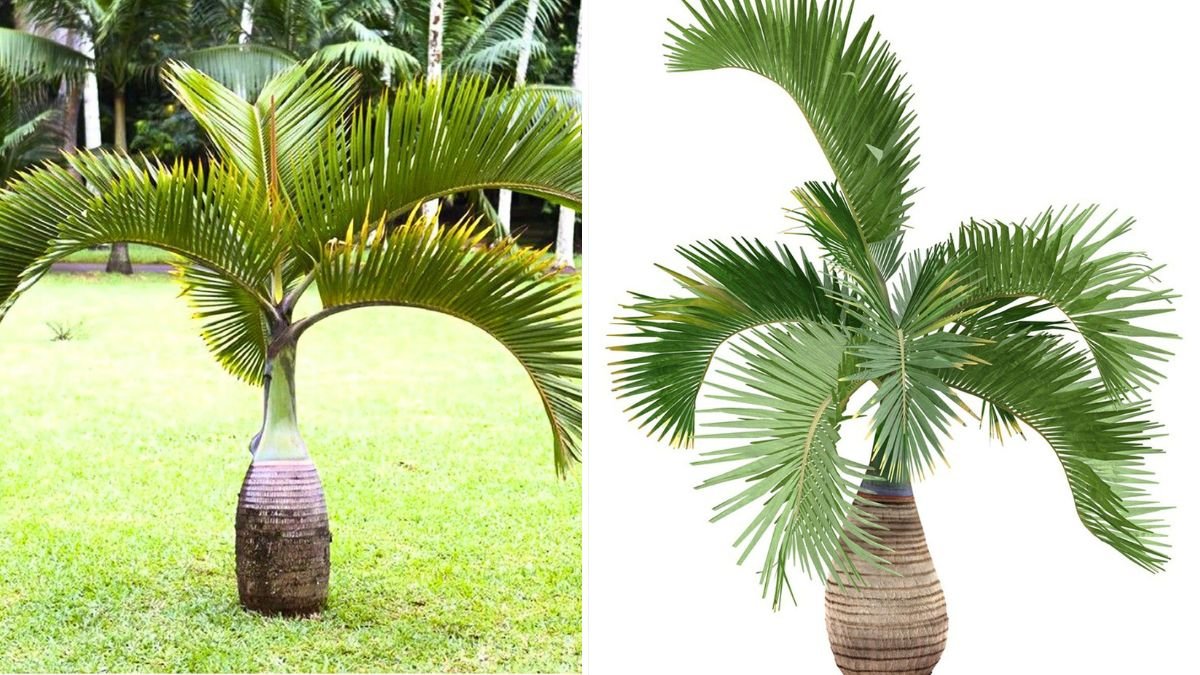
The Bottle Palm is native to the Mascarene Islands, particularly Mauritius. It is distinguished by its swollen trunk, which is bulbous near the base and tapers as it ascends. The Bottle Palm can grow to heights of about 20 to 25 feet (6 to 8 meters), and its fan-shaped leaves can span over 4 feet (1.2 meters) wide, offering a dramatic presence.
Climate Requirements
Bottle Palms thrive in tropical and subtropical climates. They flourish in USDA Hardiness Zones 10-11, where they can receive ample sunlight, warmth, and humidity. Ideally, they should be in areas where temperatures rarely dip below 30°F (-1°C).
Site Selection
Choosing the Right Location
When selecting a site for planting your Bottle Palm, consider the following:
-
Sunlight: Full sun is essential for healthy growth. Choose a location that receives at least 6 hours of direct sunlight each day.
-
Water Drainage: Good drainage is crucial. Bottle Palms do not tolerate waterlogged soil. Look for a high spot in your yard or create a mound if necessary.
-
Spacing: If you plan to plant multiple palms, ensure they are spaced at least 8-10 feet apart to allow for their mature size.
Soil Preparation
Optimal Soil Conditions
Bottle Palms prefer well-draining soils rich in organic matter. The ideal pH range is between 6.0 and 7.0. To achieve the right conditions, consider the following steps:
-
Testing the Soil: Conduct a soil pH test to determine its acidity/alkalinity.
-
Amending the Soil: If your soil is heavy clay or too sandy, you may need to amend it:
- For Clay Soil: Mix in compost or coarse sand to improve drainage.
- For Sandy Soil: Incorporate organic material like peat moss or compost to enhance moisture retention.
-
Creating the Planting Hole: Dig a hole that is twice as wide and just as deep as the root ball of your Bottle Palm. This encourages root expansion.
Planting
Steps to Plant Your Bottle Palm
-
Prepare the Hole: Ensure the hole is loose and well-drained.
-
Placement: Remove the Bottle Palm from its pot, being careful not to disturb the roots too much. Place it in the center of the hole.
-
Backfill: Fill the hole with a mixture of the original soil and compost, gently pressing down to remove air pockets.
-
Watering: Water thoroughly after planting to help establish the roots.
-
Mulching: Apply a layer of mulch around the base to help retain moisture and suppress weeds, ensuring that the mulch does not touch the trunk.
Care and Maintenance
Watering
Bottle Palms require consistent moisture, especially during their first year of growth. Water deeply once or twice a week, allowing the top few inches of soil to dry out between watering sessions.
Fertilization
To promote healthy growth, you should fertilize your Bottle Palm during the growing season (spring through mid-summer). Use a slow-release, balanced fertilizer, or a palm-specific fertilizer that contains potassium, magnesium, and micronutrients like manganese and iron.
Pruning
Regular pruning is not necessary, but you should remove any dead or damaged fronds. This helps maintain the palm’s appearance and encourages new growth.
Pest and Disease Management
While Bottle Palms are relatively resilient, they can sometimes fall prey to pests such as spider mites and scale insects. If you notice infestations, treat them with horticultural oil or insecticidal soap. Fungal diseases may also occur due to excessive moisture; ensure good drainage and avoid overhead watering to mitigate this risk.
Propagation
Seed Propagation
Propagation from seeds can be accomplished but takes patience:
-
Collecting Seeds: Gather seeds from mature fruits when they turn brown and dry.
-
Soaking Seeds: Soak the seeds in water for 24 hours to help soften the outer shell.
-
Planting Seeds: Plant seeds in seed-starting mix about 1 inch deep, keeping the soil moist but not soggy. They may take several weeks to germinate.
-
Transplanting: Once seedlings have several true leaves, transplant them into individual pots for further growth before moving them outdoors.
Container Growing
For those in cooler climates, Bottle Palms can be grown in containers. Choose a large pot with good drainage and use a mix designed for palms. Ensure to bring them indoors during frost or chill periods.
Climate Considerations for Container-Grown Palms:
- Indoor temperature should remain between 60°F to 80°F (15°C to 27°C).
- They will require additional humidity; consider misting or using a humidifier.
Common Problems
Yellowing Leaves
If your Bottle Palm’s leaves start to turn yellow, it could indicate nutrient deficiency, overly wet conditions, or root issues. Check the soil moisture and adjust your watering schedule. Consider fertilizing if it’s not a watering issue.
Wilting
Wilting can indicate underwatering or root damage. Check the soil moisture levels and inspect the roots if necessary.
Conclusion
Cultivating Bottle Palms can create a breathtaking focal point in your tropical oasis. With the right conditions and care, these palms will thrive and become a majestic feature of your landscape, enhancing the tropical atmosphere you desire.
FAQs
1. How fast does a Bottle Palm grow?
Bottle Palms grow relatively slowly. In ideal conditions, you can expect them to grow about 6 to 12 inches per year.
2. Can Bottle Palms grow indoors?
Yes, but they need bright light and humidity. Ensure they have adequate sunlight and maintain a warm environment.
3. Are Bottle Palms cold tolerant?
Bottle Palms are not cold-hardy and should be protected from frost. They thrive in temperatures above 30°F (-1°C).
4. How often should I fertilize my Bottle Palm?
Fertilize your Bottle Palm every 4 to 6 weeks during the growing season with a slow-release fertilizer suitable for palms.
5. Should I prune my Bottle Palm?
Pruning is generally not needed but remove dead fronds to maintain a tidy appearance and promote healthy growth.
6. How can I tell if my Bottle Palm is getting too much water?
If the lower fronds are yellowing or the trunk appears mushy, this may indicate overwatering. Ensure good drainage and allow the soil to dry out between waterings.
7. Can I use regular garden soil for my Bottle Palm?
While it’s better to use a well-draining soil mix, if you use regular garden soil, make sure to amend it with sand or compost to improve drainage.
8. What is the best time to plant a Bottle Palm?
The best time to plant Bottle Palms is in the spring or early summer, allowing them to establish before the cooler months.
With this guide in hand, you’re all set to cultivate a thriving Bottle Palm, enriching your tropical oasis with its grandeur and charm!